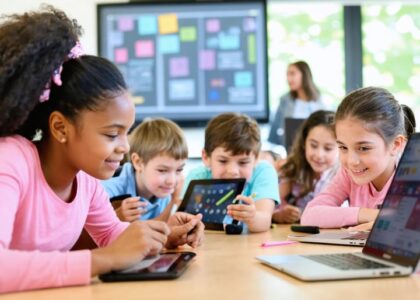
Every student deserves equal access to learning, yet approximately one in four students faces barriers in traditional digital environments. Digital accessibility tools remove these obstacles by transforming how content is presented, consumed, and understood.
Start by auditing your current digital materials using free screen readers like NVDA or built-in browser accessibility checkers to identify where students might struggle. Test whether your PDFs can be read aloud, if videos include captions, and whether images contain descriptive alt text. This baseline assessment reveals immediate opportunities for improvement without requiring specialized training.
Implement text-to-speech and speech-to-text tools directly into your daily instruction. Browser extensions like Read&Write or built-in features such as Immersive Reader in Microsoft products help students with dyslexia, visual impairments, or English language learners access content independently. These tools require minimal setup but deliver immediate results for diverse learners.
Design materials with universal accessibility from the start rather than retrofitting later. Choose high-contrast color combinations, use headings properly in documents, add captions to all video content, and provide transcripts for audio materials. When accessibility becomes your default practice rather than an afterthought, you simultaneously reduce your workload and expand student access.
Leverage your learning management system’s built-in accessibility features that you may already have but aren’t using. Most platforms include automatic captioning, adjustable text sizes, keyboard navigation, and compatibility with assistive technologies. Exploring these existing features often provides solutions without requiring additional purchases or complex integrations.
The right accessibility tools don’t complicate teaching—they simplify learning for everyone while ensuring no student is left behind due to preventable digital barriers.
What Digital Accessibility Tools Actually Mean for Your Students
Digital accessibility tools are specialized resources designed to remove learning barriers and ensure every student can access, engage with, and demonstrate their understanding of educational content. While standard educational technology offers general learning support, accessibility tools specifically address the diverse ways students process information and interact with digital materials.
Think of it this way: a typical digital textbook displays information on screen, but an accessibility tool transforms that same content into multiple formats—enlarging text for students with visual impairments, reading aloud for those with dyslexia, or allowing navigation by keyboard for learners with motor challenges. These tools work alongside your existing curriculum and enhance your differentiated instruction with technology, rather than replacing your teaching methods.
Your classroom likely includes students with varied accessibility needs, whether formally identified or not. Visual learners might benefit from screen readers, magnification tools, or high-contrast displays that make text and images easier to perceive. Students with auditory processing differences often thrive with captions, transcripts, or visual cues that supplement spoken information.
For cognitive and neurodivergent learners, accessibility tools provide structure and support that helps them organize information, maintain focus, and process content at their own pace. Text-to-speech features, graphic organizers, and distraction-reducing browsers can transform overwhelming assignments into manageable tasks. Meanwhile, students with motor challenges gain independence through voice typing, switch access controls, or alternative input devices that eliminate the need for traditional mouse and keyboard use.
The beauty of these tools is their universal benefit. When you add captions to a video or provide text-to-speech options, you’re not just supporting students with diagnosed disabilities—you’re creating flexible learning pathways that help English language learners, students in noisy environments, and those who simply learn better through multiple modalities. Accessibility tools ultimately empower all students to learn in ways that work best for them.
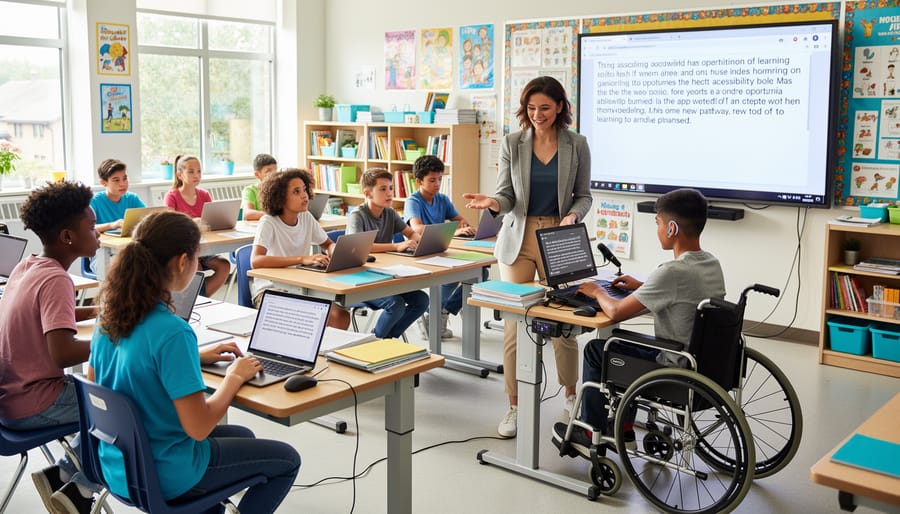
The Students You’re Reaching Now (That You Couldn’t Before)

Supporting Visual and Hearing Differences
Students with visual and hearing differences can fully participate in your classroom when you have the right digital tools in place. Screen readers like NVDA and JAWS transform on-screen text into spoken words, allowing students with visual impairments to navigate digital content independently. For those who benefit from hearing information, text-to-speech tools such as Natural Reader and Read&Write provide clear audio versions of written materials at adjustable speeds.
Captioning and transcription tools create inclusive environments for students who are deaf or hard of hearing. YouTube’s automatic captions offer a starting point, while tools like Otter.ai provide real-time transcription during live lessons. Consider Rev or Descript for creating accurate captions for recorded content you plan to reuse throughout the year.
Visual supports matter too. Browser extensions like Read Mode strip away distracting elements, while high-contrast themes and magnification tools help students with low vision access content comfortably. Color overlay tools can reduce visual stress for students with light sensitivity.
The beauty of these tools is that they often benefit all learners, not just those with identified needs. Many students find captions helpful in noisy environments, and text-to-speech can support reading comprehension across ability levels.
Empowering Students with Physical and Motor Challenges
For students with physical and motor challenges, technology opens doors that traditional learning methods may inadvertently close. Voice recognition software like Dragon NaturallySpeaking allows students to compose written work, navigate computers, and complete assignments using spoken commands rather than typing. This tool particularly benefits students with limited hand mobility or conditions affecting fine motor control.
Alternative input devices transform how students interact with digital content. Switch devices, eye-tracking systems, and adaptive mice provide customized ways to control computers and tablets. These tools recognize that one-size-fits-all keyboards and mice don’t work for everyone, and that’s perfectly okay.
Adaptive keyboards with larger keys, color coding, or moisture-resistant surfaces help students who struggle with standard keyboards maintain independence in their learning. Some feature programmable keys that execute multiple commands with a single press, reducing repetitive motions.
The beauty of these tools lies in their flexibility. Start by observing which physical tasks present barriers for individual students, then explore corresponding solutions. Many devices offer trial periods, letting you test compatibility before committing. Remember, the goal isn’t to fix students but to remove obstacles preventing them from showing what they know. When physical barriers disappear, student potential shines through.
Meeting Cognitive and Learning Diversity Needs
Students with cognitive and learning differences thrive when given tools that match their unique processing styles. Text-to-speech applications like Natural Reader help students with dyslexia access written content through auditory channels, while dyslexia-friendly fonts and customizable background colors reduce visual stress. For students with ADHD, organizational tools such as Trello or Google Keep provide visual task management, breaking assignments into manageable steps with color-coding and reminders.
Students on the autism spectrum often benefit from visual schedules like Choiceworks and predictable interfaces with minimal sensory distractions. Simplification features matter too—tools like Rewordify break down complex text into clearer language, supporting comprehension across learning profiles. Browser extensions such as Helperbird offer customizable reading experiences with adjustable line spacing, focus modes, and immersive readers.
The key is offering choice. When you provide multiple ways to access and demonstrate learning, you empower every student to engage meaningfully. Start by exploring one or two tools that address your students’ most immediate needs, then gradually expand your toolkit based on what works in your classroom.
Essential Digital Accessibility Tools Every Educator Should Know

Built-In Accessibility Features You Already Have
Before exploring specialized tools, you might be surprised to learn how many powerful accessibility features are already built into the platforms you use daily. These native features require no additional cost or complex setup—just a few clicks to activate.
Google Classroom offers automatic captioning for video content, text-to-speech through Chrome extensions, and screen reader compatibility that makes content accessible to students with visual impairments. The platform also supports voice typing, allowing students to dictate responses instead of typing them.
Microsoft Office includes Immersive Reader, a game-changing feature that reads text aloud, adjusts spacing and font size, breaks words into syllables, and highlights parts of speech. PowerPoint’s built-in live captions can transform presentations for students who are deaf or hard of hearing, while Word’s dictation feature supports students with writing challenges.
Chromebooks come equipped with ChromeVox screen reader, high-contrast modes, and magnification tools right out of the box. Select-to-speak lets students click any text to hear it read aloud—perfect for multilingual learners or students with reading difficulties.
iPads offer VoiceOver, spoken content features, and display accommodations that adjust colors and reduce motion. The iPad’s AssistiveTouch creates customized gestures for students with motor challenges.
The beauty of these built-in features is their immediate availability. Unlike specialized digital tools for K-12 that require purchasing and training, these accessibility options are waiting in your settings menu right now, ready to support every learner in your classroom.
Screen Reading and Text-to-Speech Solutions
Screen reading and text-to-speech solutions transform written content into audio, opening doors for students with visual impairments, reading difficulties, or those who simply learn better through listening. These tools are easier to implement than you might think and can make an immediate difference in your classroom.
NVDA (NonVisual Desktop Access) is a free, open-source screen reader that works seamlessly with Windows computers. It reads aloud everything on the screen, from web pages to documents, making digital content accessible to students with visual impairments. For a more comprehensive solution, Read&Write offers a toolbar that integrates directly into web browsers and word processors, providing text-to-speech, word prediction, and study tools in one place.
Natural Reader is another excellent option that converts documents, PDFs, and web pages into natural-sounding speech. Many educators appreciate its user-friendly interface and ability to handle multiple file formats. For quick accessibility without downloads, browser extensions like Read Aloud for Chrome or Firefox provide instant text-to-speech functionality for any webpage.
Start by exploring one tool that fits your current technology setup. Most offer free versions or educational discounts, allowing you to test features before committing. Remember, these solutions benefit all learners, not just those with identified needs, creating a more inclusive learning environment for everyone.
Visual Support and Content Modification Tools
Visual support tools help all students process information more effectively by allowing them to customize how content appears on their screens. These adaptations are particularly valuable for learners with visual processing differences, dyslexia, or attention challenges.
Browser-based zoom features are your starting point and require no additional downloads. Students can enlarge text and images using keyboard shortcuts (Ctrl and + on Windows, Command and + on Mac) or through browser settings. This simple adjustment often makes a significant difference for students who struggle with small print.
Color and contrast adjustment tools address the needs of students with color blindness, light sensitivity, or visual fatigue. Extensions like Dark Reader automatically adjust webpage colors to reduce eye strain, while high contrast modes in operating systems create clearer visual boundaries between elements. Windows Magnifier and macOS Zoom offer built-in magnification with customizable contrast settings.
Simplification extensions transform cluttered webpages into clean, readable formats. Reader View (available in most browsers) removes advertisements and navigation bars, helping students focus on core content. Mercury Reader and Just Read offer additional customization options for font style, size, and background color.
For students who benefit from visual schedules and organizational supports, tools like Pictello and Boardmaker create customized visual aids that reinforce daily routines and academic expectations, promoting independence and reducing anxiety around transitions.
Communication and Expression Platforms
Communication and Expression Platforms open new pathways for students who benefit from alternatives to traditional speaking and writing. These tools recognize that every learner has valuable ideas to share, and sometimes they just need the right method to express them.
Augmentative and Alternative Communication (AAC) apps like Proloquo2Go and TouchChat provide customizable symbol-based communication systems. Students can select images or symbols that generate speech, building sentences at their own pace. These platforms work beautifully for students with speech delays, autism, or conditions affecting verbal communication. Many teachers find that starting with simple boards containing 15-20 high-frequency words helps students gain confidence before expanding their vocabulary.
Voice typing tools have become remarkably accurate and accessible. Google Docs Voice Typing and Microsoft Dictate allow students to speak their thoughts directly into written text. This benefits students with dysgraphia, physical disabilities affecting handwriting, or those who simply think better out loud. The key is teaching students to speak naturally and use simple voice commands for punctuation.
Consider also platforms that support multimodal expression. Book Creator lets students combine text, audio, video, and drawings into digital books, while Flipgrid enables video responses where students can show and tell their understanding. These options honor different learning preferences and give every student a voice.
Start by introducing one tool that addresses your students’ most pressing communication needs, then gradually expand your toolkit as you and your learners grow comfortable with these empowering resources.
Making It Work in Your Classroom Tomorrow

Start Small: Your First Three Steps
You don’t need to transform your entire classroom overnight. Here are three manageable steps you can take this week to start your accessibility journey:
Begin by exploring one built-in feature you already have. Turn on the text-to-speech function in Google Docs or enable live captions during your next video lesson. Spend just 15 minutes getting familiar with how it works. You’ll be surprised how quickly these tools become second nature, and your students will benefit immediately.
Next, ask your students what would help them learn better. Create a simple poll or have an informal conversation about whether larger text, audio options, or visual supports might make a difference. Their feedback will guide your priorities and show them that their learning needs matter.
Finally, pick one lesson this week to redesign with accessibility in mind. Add captions to a video, provide both written and verbal instructions, or offer information in multiple formats. This single lesson becomes your template for future planning.
Remember, every small step counts. By starting with these three actions, you’re building habits that will naturally expand over time, creating a more inclusive classroom for all learners.
Creating Accessible Lesson Materials from the Start
Building accessibility into your materials from the beginning saves time and ensures all students can engage with content meaningfully. Universal Design for Learning (UDL) principles guide this approach, emphasizing multiple means of representation, engagement, and expression.
Start with document formatting that benefits everyone. Use clear headings, bullet points, and sufficient white space. Choose sans-serif fonts like Arial or Verdana in 12-point or larger sizes. Ensure text and background colors have strong contrast—aim for a 4.5:1 ratio minimum. When creating PDFs, always generate them from source files rather than scanning images to maintain screen reader compatibility.
Videos require captions and transcripts, which support not just deaf or hard-of-hearing students but also English language learners and those in sound-sensitive environments. Many platforms now offer automatic captioning as a starting point, though you’ll want to review for accuracy. Tools like YouTube’s built-in editor make corrections straightforward.
Images need descriptive alt text explaining their educational purpose. Instead of “graph,” write “bar graph comparing average temperatures across four seasons, showing summer as highest at 85 degrees.” This practice aligns seamlessly with smart tech integration strategies you’re already implementing.
Consider providing content in multiple formats—text, audio, and visual—so students can choose what works best. This flexibility reduces barriers while enhancing learning for everyone. Remember, accessibility features you build in today become time-savers tomorrow, eliminating last-minute accommodations and creating truly inclusive learning environments.
Teaching Students to Use Their Tools Effectively
Introducing accessibility tools effectively starts with transparency and connection to learning goals. Begin by demonstrating how specific tools work, using real classroom examples that show their benefits beyond accommodation—many tools help all students organize thoughts, manage workload, or comprehend complex material. Normalize tool use by incorporating them into whole-class activities first, removing any stigma around assistive technology.
Build independence gradually through guided practice. Start with one tool at a time, allowing students to explore features with structured support. Create simple visual guides or tutorial videos students can reference independently. Encourage peer mentoring, where students who master a tool can support classmates—this builds community while reducing your workload.
Schedule regular check-ins to ensure students understand their tools and feel comfortable using them across different subjects. Celebrate successes when students advocate for their technology needs or troubleshoot problems independently. Remember that building confidence with digital tools is itself a valuable skill, preparing students for future learning environments where self-advocacy and technological literacy are essential.
Overcoming Common Barriers and Concerns
When Budget and Resources Are Limited
Limited budgets shouldn’t prevent you from making your classroom more accessible. Many powerful accessibility tools are completely free and readily available. Start by exploring built-in features already on your devices—both Windows and Mac computers include screen readers, voice control, and text-to-speech capabilities at no extra cost. Google Workspace for Education and Microsoft Office 365 Education offer accessibility checkers, captions, and alternative text features that integrate seamlessly with your existing workflow.
Consider applying for technology grants through organizations like DonorsChoose or local educational foundations specifically designated for inclusive learning initiatives. Many companies also provide free licenses for educational institutions—simply search for “education discounts” alongside the tool name.
Connect with online educator communities and forums where teachers share resources and strategies for implementing technology on tight budgets. Platforms like Reddit’s teacher communities and specialized Facebook groups offer peer support and recommendations for budget-friendly solutions.
Remember, accessibility often starts with simple adjustments rather than expensive software. Focus on one tool at a time, master it thoroughly, and gradually expand your toolkit as opportunities arise. Your commitment to inclusive education matters more than your budget size.
Navigating Pushback and Building Support
Introducing digital accessibility tools often requires thoughtful conversation with stakeholders who may not immediately recognize their value. When you encounter resistance, remember that it usually stems from lack of awareness rather than opposition to inclusive practices.
Start by sharing specific student success stories that demonstrate how accessibility tools have made a difference. Real examples resonate far more powerfully than abstract arguments. You might explain how text-to-speech helped a struggling reader finally engage with grade-level content, or how speech-to-text enabled a student with dysgraphia to express brilliant ideas they previously couldn’t capture on paper.
Frame accessibility tools as beneficial for all students, not just those with identified needs. Research shows that features like closed captions, adjustable text sizes, and multiple means of representation support diverse learning styles and preferences across your entire classroom. This universal design approach removes the stigma sometimes associated with accommodations.
Address budget concerns proactively by highlighting free and low-cost options that deliver significant impact. Many built-in features on devices your school already owns provide robust accessibility support at no additional expense. When requesting funding for premium tools, connect them directly to student achievement goals and learning outcomes that matter to administrators.
Build allies among colleagues by offering to demonstrate tools in action or co-teach a lesson showcasing their implementation. Creating a small community of early adopters helps normalize accessibility practices and provides peer support. Share resources through staff meetings or professional learning communities to gradually shift your school’s culture toward inclusive technology integration.
Remember, advocacy is a marathon, not a sprint. Each conversation plants seeds that contribute to lasting change.
As you explore and implement digital accessibility tools in your classroom, remember that this journey benefits every single student who walks through your door. These tools don’t simply accommodate students with disabilities—they create richer, more flexible learning experiences that allow all learners to engage with content in ways that work best for them. When you add captions to videos, you’re helping English language learners build vocabulary. When you provide text-to-speech options, you’re supporting students who learn better through listening. When you offer multiple ways to demonstrate knowledge, you’re unlocking potential you might never have seen otherwise.
Accessibility isn’t a checkbox to mark off or a compliance requirement to meet—it’s an ongoing practice that grows with your teaching. Start small, experiment with one or two tools, and build from there. Some strategies will work beautifully right away, while others might need adjustment. That’s perfectly normal and part of the process.
You don’t have to navigate this journey alone. The Teach Find community is here to support you every step of the way. Connect with fellow educators who are implementing these same tools, share what’s working in your classroom, and learn from the collective wisdom of teachers across the country. Together, we’re building classrooms where every student has the opportunity to succeed. Your commitment to accessibility today shapes a more inclusive tomorrow for all learners.