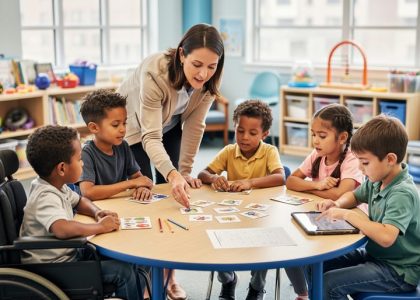
Creating a kindergarten inclusion classroom means designing a learning environment where students with disabilities and typically developing children learn together, using differentiated instruction, collaborative teaching, and assistive technology to ensure every child can access the curriculum and participate meaningfully in classroom activities. This approach benefits all learners, building empathy and social skills while preparing students with diverse needs for academic success from their earliest school years.
The shift toward inclusive practices in kindergarten classrooms reflects a growing understanding that separating students by ability often creates more challenges than it solves. When implemented thoughtfully, early childhood inclusion strengthens the entire classroom community. Research shows that students with disabilities make greater academic and social gains in inclusive settings, while their peers develop stronger communication skills and a deeper appreciation for individual differences.
The reality is that many educators feel unprepared for this work. You might wonder how to meet IEP goals while keeping your whole class engaged, or how to manage different learning paces without leaving anyone behind. The good news is that inclusion doesn’t require you to become an expert in every disability or to reinvent your teaching from scratch. It asks you to build on what you already know about good teaching, adding specific strategies and supports that make your instruction accessible to more learners.
This guide walks you through the complete process of establishing and maintaining an effective inclusion classroom, from gathering the right materials and understanding legal requirements to implementing daily routines that work for every student.
What You’ll Need to Get Started

Physical Classroom Setup
An inclusion classroom requires intentional furniture choices and spatial design. Start with flexible seating: a mix of standard chairs, wobble stools, floor cushions, and standing desk options lets students choose what helps them focus best. Position these near quiet work areas and collaborative learning centers so children can move between independent and group tasks without disruption.
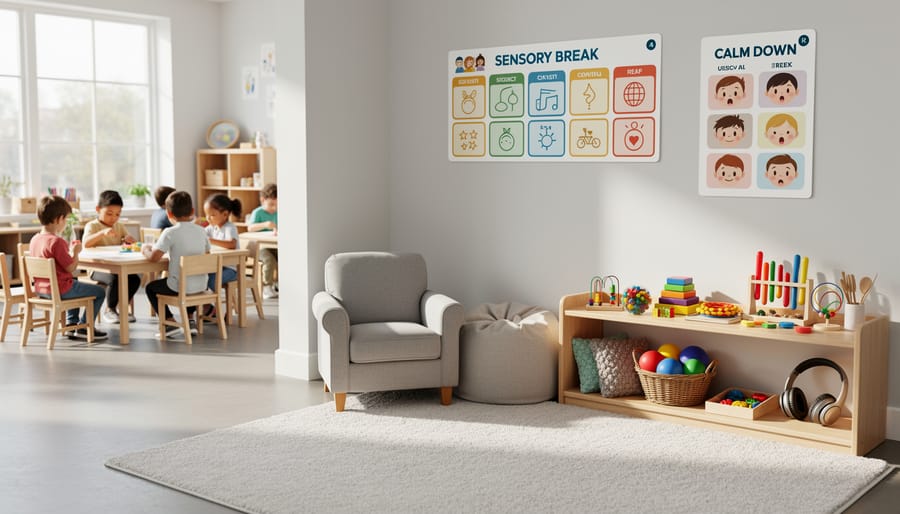
Create clearly defined zones using low shelves, rugs, and visual boundaries. A sensory-friendly corner with soft lighting, noise-canceling headphones, and calming materials gives overwhelmed students a place to reset. Your literacy center needs accessible book displays at multiple heights, while the math manipulatives area should offer tools that students can reach independently, whether seated on the floor or at a table.
Wide, clutter-free pathways between zones accommodate wheelchairs, walkers, and children who need extra space to navigate safely. Mount visual schedules, anchor charts, and student work at eye level for kindergarteners of all heights. This physical foundation supports UDL for accessible learning by offering multiple ways for every child to engage with the environment.
Essential Inclusive Technologies
Digital tools transform inclusion from theoretical ideal into daily classroom reality. The right technologies give every kindergarten student, regardless of ability, genuine access to learning.
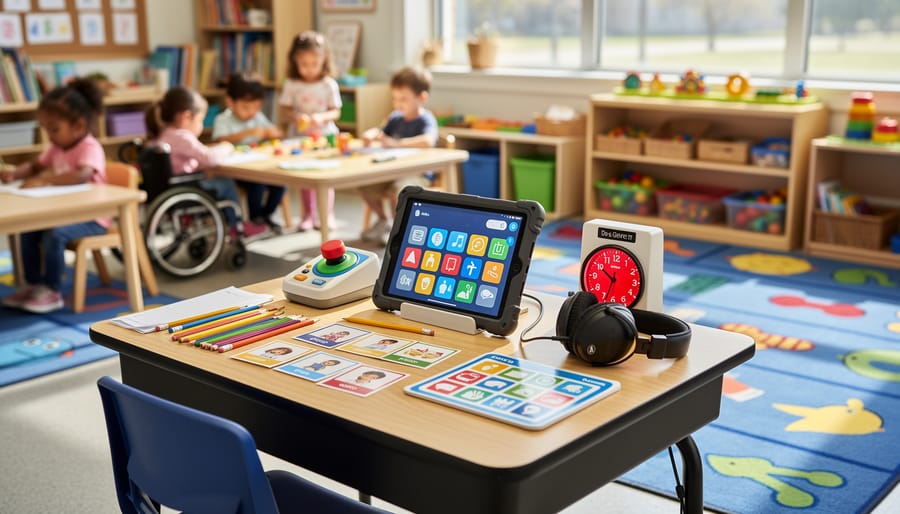
Communication platforms form the foundation. Apps like Proloquo2Go and TouchChat provide voice to nonverbal students through picture-based communication boards on tablets. These aren’t specialized add-ons; they become standard classroom tools that all students can explore, reducing stigma while building communication skills across the board.
Adaptive learning software adjusts automatically to each child’s pace. Programs like Seesaw and Epic! allow you to differentiate without creating separate lesson plans, students work on the same core content at individualized challenge levels. The software handles the scaffolding you’d otherwise manage manually for 20+ children simultaneously.
Text-to-speech and speech-to-text tools break down literacy barriers early. Natural Reader and Google’s built-in accessibility features let emerging readers access grade-level content before their decoding skills catch up, while speech-to-text captures ideas from students whose fine motor skills lag behind their thinking.
Interactive whiteboards with touch capability accommodate students who struggle with traditional writing tools. Pair them with simple stylus adapters or larger touchpoints, and suddenly every child can participate in group activities without specialized equipment drawing attention.
Start with one category that addresses your most pressing access gap. Master it, then expand, perfection isn’t the goal, participation is.
Important Considerations Before You Begin
Before you start transforming your classroom, understand the legal and ethical frameworks that protect students with disabilities. Every kindergartner with an Individualized Education Program (IEP) has a legally binding document that outlines specific accommodations, modifications, and services they must receive. You cannot modify these requirements on your own, any changes require the full IEP team’s input and written agreement, including parents, specialists, and administrators.
Accessibility standards extend beyond physical space. The Americans with Disabilities Act (ADA) and Section 504 require that all learning materials, activities, and inclusion technology provide equal access to students with disabilities. This means digital resources need compatible screen readers, videos require captions, and hands-on activities need tactile alternatives when appropriate. Don’t assume a tool is accessible just because it’s marketed as educational, test it with your students’ actual needs in mind.
Parent communication requires transparency and partnership from day one. Some families may feel anxious about inclusion settings, while others might worry their typically developing child will receive less attention. Address these concerns proactively with clear information about how you’ll meet every student’s needs. Never discuss one child’s disability or behaviors with another child’s parents, confidentiality isn’t optional.
The biggest pitfall? Treating inclusion as “fitting special education students into a general education classroom” rather than redesigning your classroom for all learners. This mindset leads to surface-level accommodations that don’t truly support participation. When you view diverse learners as problems to solve instead of students who enrich your classroom community, you’ve already undermined your inclusion efforts before they begin.
Step-by-Step: Creating Your Inclusion Classroom
Step 1: Assess Your Current Classroom and Student Needs
Before you can transform your classroom into an inclusive space, you need to understand what you’re working with. Start by walking through your room with fresh eyes. Can a wheelchair navigate between your learning centers? Are your bookshelves stable enough for students who might use them for balance? Take photos of your current setup, you’ll reference these later.
Next, review the IEPs and 504 plans for every student entering your class. Make a spreadsheet listing each child’s specific needs: Does Emma need visual schedules? Will Marcus require a communication device? Does Sofia need sensory breaks? This isn’t about labeling kids, it’s about identifying the tools they’ll need to succeed.
Inventory your existing resources honestly. List what adaptive materials you already have, what technologies are available through your district, and what gaps remain. Don’t assume you need everything immediately. Many successful inclusion teachers start with basic accommodations and build gradually.
Finally, schedule conversations with specialists who’ve worked with your incoming students. Occupational therapists, speech pathologists, and previous teachers can reveal practical insights that paperwork misses. Ask what worked, what didn’t, and what surprised them about each child’s learning style.
Step 2: Build Your Inclusion Support Team
Start by identifying your special education co-teacher or resource specialist, this person becomes your planning partner. Schedule a weekly 30-minute meeting to align on student goals, upcoming lessons, and accommodation strategies. You can’t do this alone, and you shouldn’t try.
Next, connect with related service providers: speech therapists, occupational therapists, and physical therapists who work with your students. Request their schedules and ask for classroom-embedded sessions rather than pull-out services whenever possible. This keeps students engaged with peers and helps you observe therapy techniques you can reinforce daily.
If you have a paraprofessional assigned to your classroom, clarify roles from day one. Define who leads which activities, how you’ll communicate during lessons, and what support each student needs. Paraprofessionals should facilitate independence, not create dependency.
Don’t overlook your school psychologist, behavior specialist, and administrators. They provide critical support for challenging situations and ensure you’re meeting IEP requirements. Create a contact list with everyone’s availability and preferred communication methods. Strong teams communicate proactively, not just when problems arise.
Step 3: Design Your Physical and Digital Learning Environment
Start by mapping your classroom into distinct zones that serve different learning modes and sensory needs. Create a quiet reading corner with soft seating and reduced visual clutter for students who need calmer spaces. Position a sensory-friendly area away from high-traffic zones, stocked with fidget tools, weighted lap pads, and noise-canceling headphones. Arrange your whole-group instruction space so every child has clear sightlines to visual aids and can reach any interactive displays you use.
Next, integrate assistive technologies where students will actually use them. Mount tablets with communication apps at accessible heights in multiple learning centers, not just at one “tech station.” If you’re using text-to-speech software or audiobooks, set up listening stations with headphones near your literacy center. Install adjustable-height tables that accommodate wheelchairs and allow standing work for kids who need movement.
Label every learning station with both words and pictures. Use visual schedules with Velcro-backed cards so students can move through routines independently. Ensure pathways between centers are wide enough for mobility devices and that materials on shelves sit within reach for all students. This physical setup isn’t decoration, it’s the infrastructure that makes differentiated instruction possible every single day.
Step 4: Develop Differentiated Instruction Plans
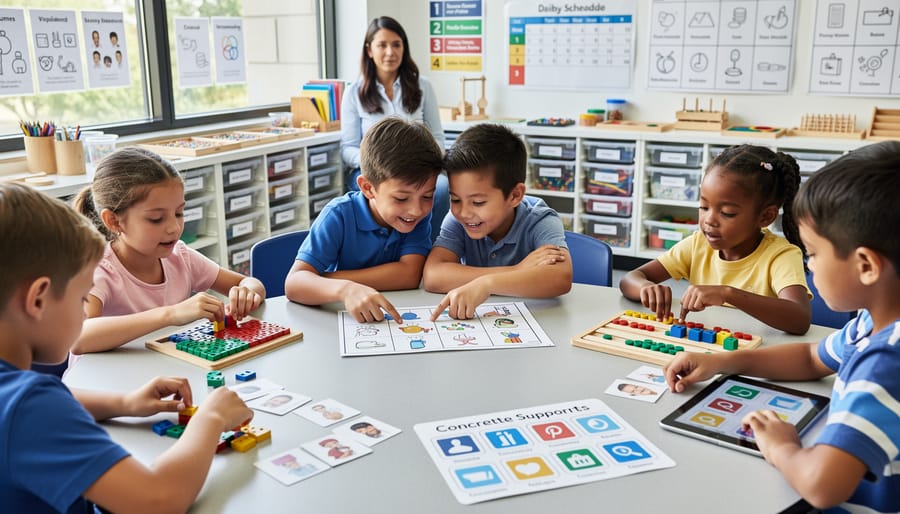
Start with the lesson’s core learning objective, then build three distinct pathways to reach it. One student might demonstrate understanding through verbal explanation, another through drawing, and a third using manipulatives or assistive technology. This approach, grounded in universal design ensures every child can access grade-level content without watering down standards.
Create a simple framework template for each lesson: list the standard, identify the essential concept all students must grasp, then outline multiple ways students can learn it, practice it, and show mastery. For a counting lesson, this might mean number cards for some learners, a touch-screen app for others, and physical objects for those who need concrete manipulation. The standard remains constant; the routes there vary.
Keep a running document of what works for each child. When a student succeeds with a particular approach, whether it’s visual schedules, peer partnering, or extended response time, note it. These observations become your personalized toolkit, making future planning faster and more effective.
Step 5: Integrate Inclusive Educational Technologies
Start with the most user-friendly tools first. Introduce one communication app during morning circle time so students become comfortable with it before adding complexity. For nonverbal students or those with speech delays, picture-based apps like Proloquo2Go or TouchChat enable participation in songs, stories, and class discussions. Demonstrate each tool to the whole class, then let students explore during center time with your support.
Assistive learning tech works best when it becomes part of established routines rather than special accommodations. Build tablet time into literacy and math centers, loading adaptive software that adjusts difficulty based on each child’s performance. Pair struggling readers with apps that highlight words as they’re spoken, while advanced students access extension activities on the same devices. Keep chargers organized and accessible, assign device buddies to help with technical issues, and create visual guides showing which apps to use during each activity.
Train your support team on every technology before launch day. Schedule fifteen-minute practice sessions where paraprofessionals and therapists learn app navigation, troubleshooting, and when to step back so students develop independence. Update your daily visual schedule to include technology rotations, making digital tools predictable elements of classroom life.
Step 6: Establish Classroom Routines and Social Structures
Start each day with a morning meeting circle where every child shares one thing, using words, pictures, or gestures. This predictable routine gives students with communication differences multiple ways to participate while teaching typically developing peers that everyone has a voice worth hearing.
Create visual schedules using photographs of your actual classroom activities. Post them at student eye level and reference them throughout the day. Predictability reduces anxiety for students with disabilities while helping all kindergarteners develop time awareness and independence.
Implement a structured buddy system that rotates weekly. Pair students strategically, ensuring children with disabilities work with different peers who can model skills without being assigned as permanent helpers. Coach buddies on specific support strategies: “Show Maya how you hold the scissors” rather than “Help Maya.”
Build empathy through children’s books featuring characters with disabilities, followed by concrete discussions about how friends can include everyone in play. Role-play common scenarios: what to do when a classmate needs more time to respond, or how to invite someone who uses a wheelchair to join block building.
Establish consistent transition signals, a specific song, visual timer, or gentle chime, that all students recognize. These cues help children with sensory sensitivities prepare for changes while teaching everyone self-regulation skills they’ll use throughout their education.
Technology Tools That Make Inclusion Accessible
Modern inclusive educational technologies transform what’s possible in a kindergarten inclusion classroom by removing barriers that once made full participation difficult. The right tools don’t complicate your teaching, they simplify it by giving every child multiple ways to learn, communicate, and demonstrate understanding.
Communication and Expression Tools
Proloquo2Go and TouchChat are augmentative communication apps that give nonverbal students a voice through picture-based communication boards. Students tap images to build sentences, request help, or share ideas during circle time and small group activities. These apps integrate seamlessly into existing classroom routines, you can project a student’s communication board on your smartboard so classmates see their contributions in real time.
Adaptive Learning Platforms
Seesaw and Epic! offer built-in accessibility features that support diverse learners without separate accounts or complicated setup. Seesaw’s voice recording lets students who struggle with writing explain their thinking verbally, while text-to-speech reads instructions aloud for emerging readers. Epic! adjusts reading levels automatically and includes audiobook versions of thousands of titles, ensuring all students access the same stories at their individual reading level.
Sensory and Focus Support
Simple Chrome extensions like Read&Write provide word prediction, text-to-speech, and picture dictionaries that help students with language processing or attention challenges stay engaged during computer-based activities. For students who need movement breaks, the GoNoodle app offers quick brain breaks that benefit the entire class while meeting sensory regulation needs.
Physical Accessibility Devices
Touch-screen styluses with larger grips accommodate students with fine motor challenges, while adjustable tablet stands position devices at angles that work for students with physical disabilities or visual impairments. These modifications cost under twenty dollars but dramatically expand who can participate independently in digital learning centers.
Start with one or two tools that address your students’ most pressing access needs, then expand as you grow comfortable with implementation.
How to Know Your Inclusion Classroom Is Working
Successful inclusion isn’t measured by perfect behavior or identical achievement, it’s seen in meaningful participation, steady progress, and genuine belonging. Watch for natural peer interactions during centers and transitions. Are students without disabilities initiating conversations and play with their classmates who have disabilities? Do children with IEPs engage in activities at their level without constant adult prompting? These spontaneous moments reveal whether your environment truly supports all learners.
Track concrete progress through the same data points you’d use for any kindergarten classroom: letter recognition, number sense, social skills checklists, and self-regulation observations. The difference lies in honoring each child’s baseline and celebrating growth from that starting point. A student who moves from parallel play to cooperative play shows inclusion working, even if academic gains come more slowly. Document these wins weekly, not just during formal assessment periods.
Technology use provides tangible evidence of effectiveness. Check device logs and app analytics, are adaptive tools being accessed daily, or sitting idle? Students should independently use communication apps, access modified content, and engage with assistive tech without constant adult setup. If you notice certain tools remain unused or reduce digital gaps inconsistently, that’s feedback requiring adjustment.
When progress stalls, resist the urge to blame the inclusion model. Instead, convene your support team within two weeks. Review whether accommodations match current needs (kindergarteners change fast), verify that paraprofessionals implement strategies consistently, and check if sensory or scheduling factors need tweaking. Small refinements, moving a sensory break ten minutes earlier, switching from visual to tactile cues, often restart momentum without major overhauls.
Next Steps and Ongoing Growth
Your inclusion classroom will evolve significantly throughout the school year as you learn what works for your specific group of students. Plan to review and adjust your strategies every 4-6 weeks, using the data you’ve collected and feedback from your support team.
Professional development should remain a priority. Look for workshops focused on Universal Design for Learning (UDL), behavior intervention strategies, and emerging assistive technologies. Many state education departments offer free webinars specifically for inclusion educators. Consider pursuing a certificate in special education or inclusion practices if you want to deepen your expertise.
Connect with other inclusion teachers through online communities and local educator groups. These networks provide invaluable troubleshooting support when you encounter unique challenges. Many experienced inclusion educators are willing to share lesson plans, technology tips, and management strategies that have worked in their classrooms.
Schedule regular observations with colleagues who have strong inclusion practices. Observing another classroom for even 30 minutes can spark new ideas and help you see what’s possible. Invite others to observe your classroom and provide constructive feedback.
Document what works and what doesn’t. Keep a simple journal or digital notes about successful strategies, challenging moments, and student breakthroughs. This reflection practice will make you a better inclusion educator and give you concrete examples to share with other teachers considering this approach.
The most successful inclusion educators view their practice as constantly evolving rather than something to perfect and maintain.
Creating a successful kindergarten inclusion classroom is not only achievable but transformative for every student who walks through your door. While the initial setup requires thoughtful planning and coordination, the step-by-step approach outlined here breaks down what can seem overwhelming into manageable actions you can take tomorrow.
The benefits extend far beyond compliance with mandates or meeting IEP requirements. When you build an inclusion classroom, you create an environment where typically developing students learn empathy, patience, and acceptance as natural parts of their daily experience. Students with disabilities gain access to rich peer models and age-appropriate curriculum. Everyone benefits from the differentiated instruction strategies and varied learning approaches that inclusion demands.
Start small if you need to. Choose one assistive technology to integrate this month. Rearrange your learning centers to improve accessibility. Connect with your special education team to discuss one student’s needs in depth. Each action you take builds momentum and confidence.
You have the tools, the framework, and the support structures to make this work. Your willingness to create a classroom where all students belong and thrive matters more than perfect execution from day one. Take that first step.
Frequently Asked Questions
How can one teacher effectively meet everyone’s needs in an inclusion classroom?
You don’t do it alone. Successful inclusion relies on a support team that includes special education teachers, therapists, and trained paraprofessionals who work alongside you. The key is coordinated planning and clearly defined roles so everyone knows who’s addressing which needs during each activity.
What should I do when a student with behavioral challenges disrupts the entire class?
First, work with your special education team to understand the function of the behavior and develop a consistent response plan. Establish clear classroom expectations that apply to everyone, use visual supports and sensory breaks proactively, and have a designated calm-down area. Most important: teach all students empathy and how to support each other rather than react negatively.
How do I train paraprofessionals who have never worked in an inclusion setting?
Start with shadowing and co-teaching rather than throwing them in independently. Provide a written guide to your classroom routines, student accommodations, and communication systems. Schedule brief daily check-ins during planning time to answer questions and adjust approaches based on what’s working.
What’s the best way to communicate with parents who worry their typically developing child won’t get enough attention?
Share concrete examples of how inclusion benefits all students academically and socially, including research on peer modeling and social-emotional growth. Invite them to observe or volunteer so they see the classroom dynamics firsthand. Be transparent about how you differentiate instruction to challenge every learner at their level.
How do I balance accommodations with maintaining grade-level standards?
Accommodations change how students access and demonstrate learning, not what they’re expected to learn. A student might listen to a story instead of reading it independently, or show understanding through pictures instead of writing, while still working toward the same comprehension standards as peers.
What if my school doesn’t have the budget for all the assistive technology and materials?
Start with free or low-cost options like tablet apps with accessibility features already built in, library resources, and flexible seating you can create from donated materials. Write grants specifically for inclusion technology, and reach out to parent organizations and community groups who often fund classroom needs schools can’t cover.
How long does it take before an inclusion classroom runs smoothly?
Expect the first six to eight weeks to feel chaotic as you learn each child’s needs and refine your systems. Most teachers report finding their rhythm by mid-fall, though you’ll continuously adjust throughout the year as students grow and change. The initial investment of time and patience pays off with a classroom culture that truly works for everyone.
These questions reflect the real concerns educators face when implementing inclusion for the first time. The challenges are genuine, but they’re also solvable with the right support structures, mindset, and willingness to adjust your approach. Remember that struggling in the beginning doesn’t mean you’re doing it wrong. Every experienced inclusion teacher went through the same learning curve you’re experiencing now.
The most successful educators treat questions and concerns as opportunities to refine their practice rather than signs of failure. Keep notes on what works and what doesn’t, share strategies with colleagues facing similar challenges, and give yourself permission to try something different when your first approach isn’t effective. Your kindergarten inclusion classroom will improve week by week as you gain experience and confidence.