
Choosing the right instructional method transforms how students engage with content, retain information, and develop critical thinking skills. Effective teaching isn’t about applying a single approach to every lesson. It’s about matching your methods to your learning objectives, student needs, and classroom context. Whether you’re introducing direct instruction for foundational concepts, facilitating collaborative learning for complex problem-solving, or guiding inquiry-based exploration, each method serves a distinct purpose in your instructional toolkit.
The challenge most educators face isn’t recognizing that different methods exist. It’s knowing which approach to select for a specific learning goal, how to implement it with fidelity, and when to pivot based on student response. A well-structured lecture can be remarkably effective for introducing new vocabulary to elementary students, while that same content might demand interactive discussion or hands-on practice for deeper comprehension.
This guide walks you through the complete process of selecting and implementing instructional methods in your classroom. You’ll learn what preparation each approach requires, how to avoid common mismatches between methods and learning goals, and how to execute each strategy step by step. We’ve structured this resource to give you practical decision-making frameworks, not theoretical definitions you already know.
Your classroom is unique. Your students bring diverse backgrounds, learning profiles, and prior knowledge. The methods you choose should reflect that diversity while moving every student toward mastery. By the end of this article, you’ll have concrete strategies for evaluating which instructional approaches fit your current teaching context and a clear process for trying new methods with confidence.
Essential Tools and Resources You’ll Need
Before you introduce a new instructional method to your classroom, gather the right resources to support both your planning and your students’ learning. You don’t need an elaborate setup or a large budget, the goal is to collect practical tools that match your teaching context and give you flexibility as you experiment with different approaches.
Start with planning resources. A reliable lesson plan template that includes space for learning objectives, method selection, and reflection notes will keep you organized. Many educators find it helpful to maintain a digital or physical binder where they can collect articles, strategy guides, and examples of methods in action. Professional learning communities, whether through your school district or online forums, provide valuable peer insights as you prepare to try something new.
Your classroom materials will vary depending on which methods you’re implementing. For cooperative learning, you might need group role cards or task organizers. Inquiry-based approaches often require primary sources, manipulatives, or research guides. Project-based learning benefits from poster boards, presentation tools, and rubrics. The key is starting with what you already have and adding materials gradually as you identify genuine needs through practice.
Essential tools organized by category include:
- Planning resources: lesson templates, curriculum maps, professional articles, peer collaboration forums
- Classroom materials: graphic organizers, anchor charts, manipulatives, group work protocols
- Technology platforms: learning management systems, interactive presentation tools, digital assessment apps
- Assessment tools: formative assessment templates, rubrics, student self-reflection forms, observation checklists
Technology can expand your instructional toolkit significantly, especially when you want to differentiate with tech. Even schools with limited devices can use free platforms for collaborative documents, quick polls, or video demonstrations. Don’t feel pressured to adopt multiple platforms at once, choose one or two that directly support your chosen instructional method.
Assessment tools deserve special attention. You’ll need ways to track student understanding in real time, not just at the end of a unit. Simple observation checklists, exit ticket templates, and student self-assessment forms help you gather the evidence you need to refine your approach. Many of these can be created from scratch or adapted from open educational resources.
Remember that your resource collection will grow organically. Start with the essentials for your first new method, document what works, and build from there.
What to Consider Before Changing Your Teaching Approach
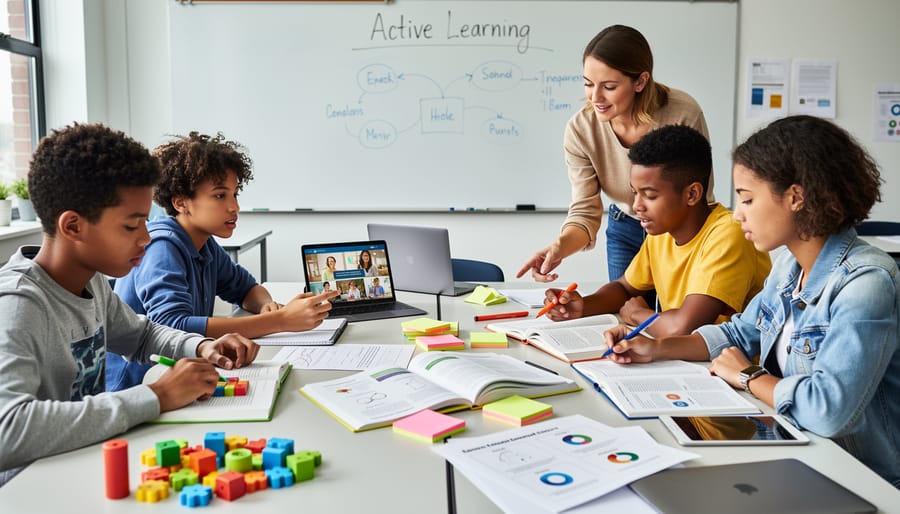
Before you shift gears in your classroom, pause to evaluate whether a new instructional method truly fits your context. A technique that works brilliantly for one teacher might fall flat in another setting, not because the method itself is flawed but because critical conditions weren’t aligned. Taking time to assess these factors upfront saves you from the frustration of mid-lesson pivots and helps ensure your students actually benefit from the change.
Start by examining your students’ readiness. Consider their prior knowledge, academic skills, and comfort with independence. A project-based learning approach requires students to manage multiple tasks and collaborate effectively, which may overwhelm a class still developing those executive function skills. Similarly, inquiry-based methods assume students can generate questions and pursue answers with guidance rather than constant direction. If your class struggles with basic routines or needs significant scaffolding for simpler tasks, you’ll likely need to build foundational skills before introducing more complex instructional approaches.
Curriculum alignment matters deeply. Your chosen method must support the specific learning standards and objectives you’re responsible for teaching, not just feel innovative. Review your pacing guide and assessment calendar. Does this approach give students adequate time to master required content? Will it prepare them for the assessments they’ll face? A method that’s engaging but doesn’t move students toward concrete learning goals ultimately wastes everyone’s time.
Class size and composition shape what’s feasible. Managing cooperative learning groups in a class of thirty-five requires different structures than in a class of eighteen. Consider the physical space you have, the support available from aides or co-teachers, and whether your students have particular needs that demand more individualized attention. A method requiring intensive one-on-one conferencing might be unrealistic without additional adult support.
Cultural responsiveness deserves careful thought. The method should honor your students’ backgrounds and allow diverse perspectives to surface, not impose a single way of thinking or participating. Reflect on whether the approach accommodates different communication styles, family structures, and cultural values. Integrating inclusive strategies from the start prevents the need to retrofit accessibility later.
Finally, assess your own preparation. Do you understand the method well enough to troubleshoot when students struggle? Have you observed it in action or completed training? If you’re uncertain about implementation details or lack models to reference, seek mentorship or professional development before introducing it to students. Starting with partial knowledge often leads to inconsistent execution that confuses learners and undermines your confidence.
Step-by-Step Process for Selecting and Implementing Instructional Methods
Step 1: Assess Your Learning Objectives and Student Needs
Before you can select an instructional method, you need a clear picture of two things: what you want students to learn and where they are right now. Start by revisiting your learning objectives. What specific knowledge or skills should students gain from this lesson or unit? Write these as observable outcomes (“Students will be able to analyze primary sources” rather than “Students will understand history”). This clarity helps you match methods to goals later.
Next, assess your students’ current readiness. Review recent assessments, look at prerequisite skills, and consider any learning gaps that might affect their success. A quick diagnostic quiz, entrance ticket, or informal discussion can reveal what students already know and where they need support.
Finally, map out the diverse learning needs in your classroom. Note students with IEPs or 504 plans, English language learners, students who need enrichment, and different learning preferences. Consider cultural backgrounds and prior experiences that shape how students engage with content. This inventory isn’t about labeling students, it’s about understanding the range of approaches you’ll need. When you know both your destination and your starting point, you can choose methods that bridge the gap effectively for every learner in your room.
Step 2: Research and Match Methods to Your Goals
With your learning objectives clearly defined, you’re ready to explore which instructional methods will best help students achieve them. This research phase doesn’t require reading thick textbooks, it means understanding core approaches and their classroom applications.
Start with five foundational methods. Direct instruction works when you need to teach specific skills or content efficiently, like demonstrating how to solve equations or explaining historical chronology. Inquiry-based learning flips this dynamic, positioning students as investigators who ask questions and discover answers through guided exploration, ideal for science experiments or analyzing primary sources. Collaborative learning models engage students in structured group work where they build knowledge together, making them perfect for literature discussions or problem-solving tasks. Differentiated instruction lets you tailor content, process, or product to meet varied student needs within one lesson. Project-based learning immerses students in sustained, real-world challenges that integrate multiple skills.
Match methods to your goals by asking practical questions. Does your objective require students to master a procedure or develop critical thinking? Will students work individually or benefit from peer interaction? Consider a fourth-grade math teacher aiming to build fraction fluency: direct instruction introduces the concept, differentiated practice addresses varied skill levels, and cooperative learning reinforces understanding through peer explanation.
Test your match by sketching a brief lesson scenario. If the method feels forced or disconnected from your objective, it probably isn’t the right fit. Trust your professional judgment, you know your students and content best.
Step 3: Plan Your Lesson with the Chosen Method
Once you’ve selected an instructional method, translate that choice into a concrete lesson plan that brings the approach to life. Start by mapping your lesson to a realistic timeline. Break the class period into clear phases, introduction, main activity, guided practice, independent work, closure, and assign minutes to each. If you’re using project-based learning, for example, you might allocate ten minutes for launching the driving question, twenty-five for group research and planning, and ten for teams to share initial findings.
Next, list every material you’ll need and prepare it in advance. For cooperative learning, that means printed role cards, task sheets, and anchor charts explaining group norms. For direct instruction, queue up your presentation slides, prepare worked examples, and have practice problems ready to distribute. Don’t forget low-tech essentials like chart paper, markers, or manipulatives if your method requires hands-on exploration.
Build in differentiation from the start rather than retrofitting it later. Plan multiple entry points for the same content: visual aids for some learners, sentence starters for others, extension challenges for students who grasp concepts quickly. If you’re teaching inquiry-based science, prepare tiered research questions so all students investigate the same phenomenon at appropriate complexity levels.
Finally, anticipate student questions and potential confusion points. Write down likely “what if” scenarios and your responses. What happens if groups finish early? How will you redirect a student who’s off-task during independent exploration? This mental rehearsal transforms your lesson plan from a static document into a flexible roadmap you can navigate confidently in real time.
Step 4: Introduce the Method to Students

Starting a new instructional method requires transparent communication with your students from day one. Begin by explaining why you’re trying this approach and how it will help them learn. Students feel more invested when they understand the purpose behind a change rather than experiencing it as a surprise shift in routine.
Model exactly what you expect before students attempt it themselves. If you’re introducing cooperative learning, demonstrate how to share responsibilities within a group. For inquiry-based lessons, walk through how to ask productive questions and evaluate sources. Live modeling removes ambiguity and builds confidence, especially for students who struggle with transitions.
Establish clear routines that support the method. Create consistent signals for different phases of the lesson (independent work, collaboration time, whole-group discussion). Post visual reminders of procedures and behavioral expectations where students can reference them easily. In the first few sessions, narrate what you’re doing and why: “Right now we’re moving into small groups because this method works best when you can discuss ideas with peers.”
Acknowledge that adjustment takes time. Reassure students that fumbling through a new process is normal and that you’ll guide them through the learning curve. Check for understanding by asking students to restate expectations in their own words. This simple verification catches confusion early and reinforces that you’re learning this new approach together as a classroom community.
Step 5: Implement with Flexibility and Observation
Once you begin the lesson, your primary job shifts from planner to responsive facilitator. Start by scanning the room continuously: Are students making eye contact with you or their materials? Are hands going up, or do you see confused expressions? These visual cues tell you whether to pause for clarification or move forward.
Adjust your pacing based on what you observe. If a concept lands quickly, don’t belabor it, push deeper or move to application. If students struggle with a task you expected to take ten minutes, give them fifteen and compress a later activity. This isn’t abandoning your plan; it’s honoring the reality in front of you.
Offer scaffolding the moment you notice students hitting a wall. That might mean providing sentence stems during a discussion, breaking a complex task into smaller chunks, or pairing a struggling student with a peer. Keep scaffolds temporary and remove them as competence builds.
When something goes off track, technology fails, a group activity stalls, energy drops, acknowledge it quickly and pivot. Have a backup question, a quick turn-and-talk, or a simplified version ready. Real-time troubleshooting is a teaching skill you develop through practice, not something you’ll perfect on day one. Stay calm, make a decision, and keep students engaged while you adjust course.
Step 6: Gather Student Feedback and Self-Reflect
Student feedback reveals what worked and what didn’t in ways your observations alone cannot. Start immediately after the lesson with quick pulse checks: thumbs up/down, exit tickets asking one thing students understood and one they found confusing, or a brief verbal round where students share their experience. These capture honest reactions before memories fade.
Within a day or two, use more structured approaches. Simple Google Forms or paper surveys with questions like “What helped you learn today?” and “What made learning harder?” give students voice while providing you with patterns across the class. For younger students, visual scales (smiley faces, color coding) work better than written responses.
Pair student feedback with your own reflection. Review your lesson plan and ask yourself: Did students meet the learning objectives? Where did engagement drop? What took longer than expected? Note specific moments when you adapted on the fly and whether those adjustments helped. Write these observations while they’re fresh, waiting even one day dulls the details that matter most for improvement.
Compare what students reported with what you observed. If they felt confused during an activity you thought went well, that disconnect is valuable data pointing to clearer instructions or better scaffolding next time.
How to Verify Your Instructional Method Is Working
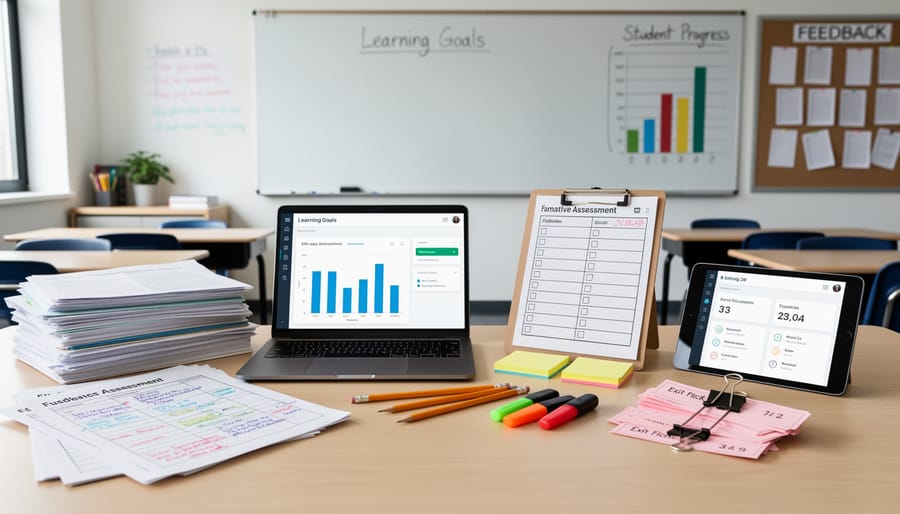
Verification isn’t a one-time event at the end of a unit, it’s an ongoing process that starts the moment you implement a new instructional method. The signals that tell you whether your approach is working appear in both measurable data and observable classroom dynamics, and learning to read both gives you the clarity to make informed adjustments.
Start with formative assessment during instruction. Watch how students respond in the moment: Are they asking questions that show deeper thinking, or are they confused about basic directions? Can they explain concepts to a peer, or do they struggle to articulate what they’re learning? Quick checks like exit tickets, think-pair-share responses, and student work samples provide immediate feedback about comprehension. These learner-focused assessments reveal whether your method is facilitating understanding or creating barriers.
Track engagement indicators alongside academic progress. Note participation patterns: Which students contribute during discussions, and who remains silent? How much redirection is needed to keep students on task? Engagement looks different across methods, silent focus during independent reading is productive, while the same silence during cooperative learning suggests a breakdown, so context matters.
- Monitor completion rates and quality of student work compared to previous approaches
- Review formative assessment results to identify concept gaps or misconceptions
- Document behavioral patterns like off-task behavior, enthusiasm, or frustration
- Compare current performance data to baseline assessments or prior units
- Seek direct student feedback through surveys, reflection journals, or conversations
When summative assessments arrive, compare results to your learning objectives. Did students meet the standards you targeted when choosing this method? If 70% of students struggled with an objective you expected them to master, that’s data worth examining. Look for patterns across student groups, if English learners or students with IEPs showed disproportionate difficulty, your method may need differentiation adjustments rather than complete replacement.
Interpreting results requires honesty about multiple factors. A method isn’t necessarily failing if one lesson falls flat; implementation skill improves with practice. But if students consistently underperform after several attempts, or if you’re spending excessive time managing behavior instead of facilitating learning, it’s time to adjust. Small tweaks like changing group sizes or adding visual supports often solve problems, while persistent struggles may signal a fundamental mismatch between method and context.
Next Steps: Refining and Expanding Your Teaching Toolkit
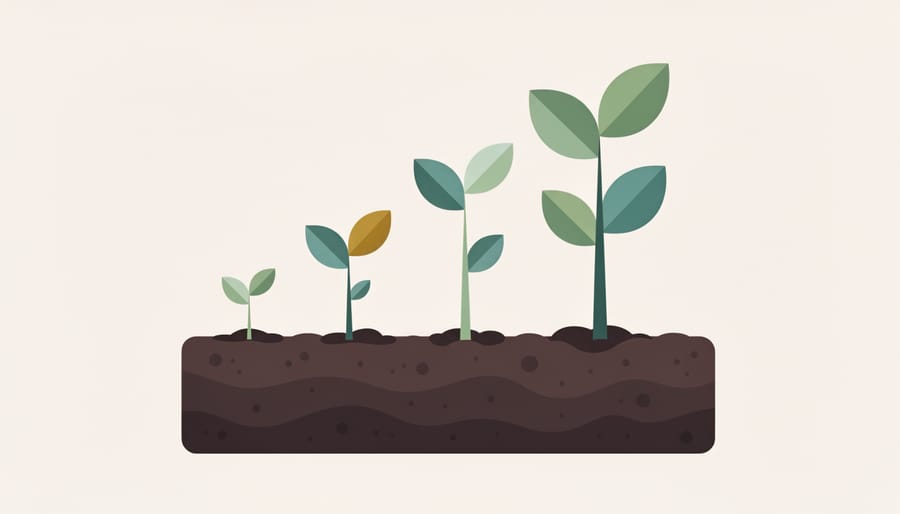
After successfully implementing your first instructional method, the real learning begins. Treat each lesson as data that informs your next decision. Review your assessment results alongside student feedback to identify what worked well and what fell flat. If direct instruction engaged most students during your math lesson but left visual learners struggling, you’ve discovered an opportunity to layer in graphic organizers or manipulatives next time. Small adjustments compound into significant improvements when you approach teaching as an ongoing experiment rather than a fixed performance.
Don’t limit yourself to a single instructional approach. The strongest teachers weave multiple methods together, matching techniques to specific learning goals within the same lesson. You might open with direct instruction to introduce a concept, transition to cooperative learning for practice, and close with inquiry-based questions that push students to apply their understanding. Start documenting which methods work best for different content types, student groups, and time constraints. This personal teaching repertoire becomes your professional asset, built from experience rather than borrowed wholesale from someone else’s classroom.
Ongoing professional development keeps your toolkit current and connected. Teach Find’s community forums provide a space to exchange lesson ideas, troubleshoot challenges, and discover how peers adapt methods across grade levels and subject areas. Use the site’s interactive tools to explore new approaches and assess which might fit your students’ needs. Attend workshops, join educator networks, and read current research, but always filter new techniques through the lens of your specific classroom context. Professional growth happens when you actively seek out fresh ideas while maintaining the confidence to reject what doesn’t serve your students.
Common Questions About Choosing Instructional Methods
Teachers often have similar concerns when exploring new instructional approaches. Understanding these common questions can help you move forward with confidence rather than hesitation.
How do I know which instructional method is best for my subject area?
Match methods to your learning objectives first, then consider your content. Science and math often benefit from inquiry-based learning and direct instruction combined, while language arts naturally lends itself to cooperative learning and differentiated instruction. Social studies thrives with project-based learning that connects to real-world issues.
Can I combine multiple instructional methods in one lesson?
Absolutely, and you should. Effective teaching rarely relies on a single approach. You might start with direct instruction to introduce a concept, shift to cooperative learning for practice, then use inquiry-based questioning to deepen understanding, all within the same class period.
What if my students resist a new teaching approach?
Resistance often signals unfamiliarity rather than unwillingness. Introduce new methods gradually, explain why you’re using them, and give students time to adjust. Start with low-stakes activities so students can build confidence before moving to graded work.
How much time should I invest in learning a new instructional method?
Start small with one method that addresses a specific challenge you’re facing. Spend 2-3 hours initially to understand the basics, then refine through practice. You’ll gain efficiency as the method becomes part of your routine, typically within 4-6 weeks of consistent use.
Do different grade levels require completely different instructional methods?
The core methods work across grade levels, but implementation varies. Elementary students need more scaffolding and shorter activity segments, while high schoolers can handle greater independence and complexity. Adjust the pacing and support level rather than abandoning effective approaches.
Where can I find reliable resources for learning about instructional methods?
Professional organizations, educational research journals, and peer collaboration offer the most credible guidance. Teach Find’s community forums connect you with educators who’ve implemented various methods, while the interactive tools provide practical templates you can adapt to your classroom.
When you’re juggling lesson planning, grading, and classroom management, concerns about adding something new to your practice are valid. The key is recognizing that choosing instructional methods isn’t about overhauling everything at once. You’re building skills incrementally, and every educator started exactly where you are now, wondering if they had the time, expertise, or support to try something different.
Many teachers worry about losing control of their classroom when shifting from familiar methods to approaches like cooperative learning or inquiry-based instruction. This fear makes sense, especially if you’ve established routines that work. The solution isn’t abandoning structure but adapting it. Clear expectations, established procedures, and consistent follow-through matter even more when students have greater autonomy. Think of it as transferring responsibility gradually rather than removing guidance entirely.
Budget constraints represent another common obstacle. Not every method requires expensive materials or technology. Socratic seminars need only thoughtful questions. Think-pair-share activities work with any content and zero additional resources. When you do need materials, start with what you have and adapt. A single tablet shared among student groups can support project-based learning just as effectively as one-to-one devices, though the logistics differ.
Choosing the right instructional methods isn’t about finding one perfect approach and sticking with it forever. It’s a skill you develop through practice, reflection, and willingness to try new things. Some lessons will go exactly as planned. Others won’t, and that’s okay. What matters is that you’re thinking critically about how your students learn best and adjusting your practice accordingly.
Give yourself permission to experiment. Start small with one new method in a single lesson, observe what happens, and build from there. Talk with colleagues about what’s working in their classrooms. Every teacher brings unique strengths and perspectives that can help you grow.
Remember, your students don’t need you to be perfect. They need you to be present, thoughtful, and committed to their learning. Each time you reflect on a lesson and consider how to improve it, you’re modeling the kind of growth mindset you want them to develop.
We built Teach Find to support you in this ongoing journey. Use our interactive tools to explore new approaches, and join our community forums to share your experiences and learn from educators facing similar challenges. You’re not alone in this work, and the teaching community is here to help you succeed.