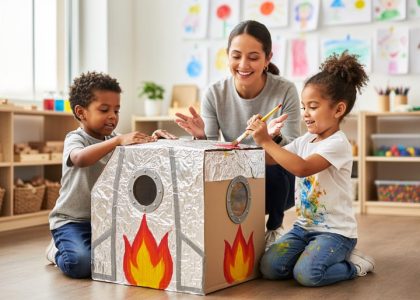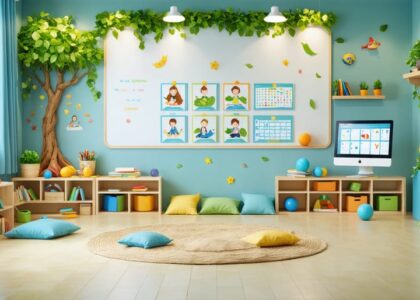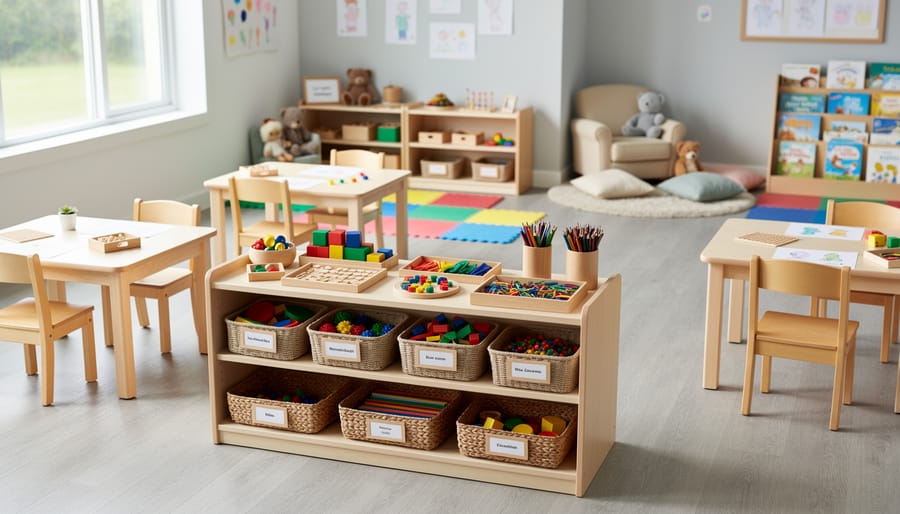
Creating a high-quality early childhood environment means designing a physical space that actively supports children’s development across all domains while keeping them safe and engaged. The most effective approach combines intentional zoning, age-appropriate materials at children’s eye level, and flexible layouts that adapt to different learning styles and group sizes. When done well, this setup takes about one to two weeks to complete and transforms how young learners explore, interact, and grow.
The difference between a standard classroom and a truly high-quality environment shows up in the details. Children should be able to make choices independently, access materials without constant adult help, and move between activities that challenge them at just the right level. Research consistently shows that thoughtfully arranged spaces reduce behavioral issues, extend attention spans, and give educators more time for meaningful interactions instead of managing chaos.
This matters because the early years set the foundation for everything that follows. The environment acts as a silent teacher, shaping how children see themselves as learners and how they interact with peers and adults. Whether you’re setting up a new classroom from scratch or refining an existing space, you’ll need to think through materials, safety protocols, layout strategies, and ways to measure what’s actually working for your specific group of children.
The good news? You don’t need an unlimited budget or a brand-new building. You need a clear framework, specific quality markers to aim for, and practical steps that fit your real-world constraints. This guide walks you through each element, from the materials list to the final check that ensures your environment truly serves the children in your care.
What High-Quality Early Childhood Environments Look Like
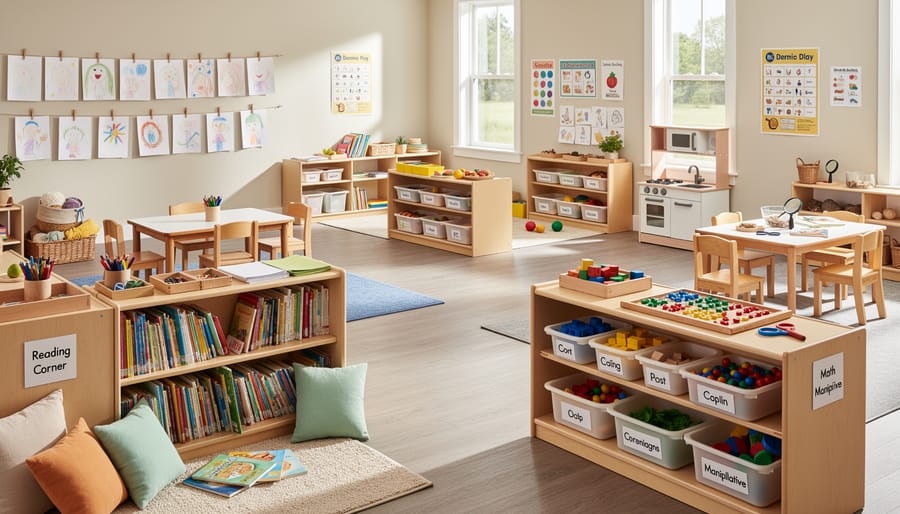
High-quality early childhood environments share five recognizable characteristics: they are safe, organized, engaging, responsive, and inclusive. When you walk into such a classroom, you immediately notice intentional design choices that support children’s independence and curiosity rather than chaos or rigid control.
Physical Space: The Foundation for Exploration
The physical environment provides clear pathways between learning areas, with furniture arranged at children’s eye level and within their reach. Materials sit on open shelves where children can see and access them independently, not stored in closed cabinets or stacked out of sight. The space includes both active areas for movement and quiet zones for concentration, positioned to minimize disruption. Natural light reaches multiple areas of the room, and each learning center has defined boundaries, created through furniture placement, rugs, or low shelving, so children understand where one activity ends and another begins.
Flexible seating options accommodate different learning styles: floor cushions for readers, small tables for collaborative work, standing easels for artists. The environment adapts to children’s changing interests and developmental needs rather than remaining static throughout the year.
Emotional Climate: Where Children Feel Safe to Take Risks
Beyond physical setup, high-quality environments cultivate an emotional atmosphere where children feel valued and secure. You’ll see this reflected in displays of children’s work at their eye level, family photos that connect home to school, and materials representing diverse cultures and abilities in an inclusive classroom.
The emotional quality shows in how teachers interact with children, responsive to their cues, patient during struggles, and intentional about creating opportunities for success. Children move through the space with confidence because they know what to expect and trust that adults will support their efforts.
Organizational Structure: Predictability That Empowers
Strong organizational systems make the environment functional. Visual schedules help children anticipate transitions. Picture labels on containers show where materials belong, teaching responsibility and literacy simultaneously. Each learning center has a clear purpose and enough materials to prevent constant conflict over resources, yet not so many that children feel overwhelmed by choices.
The daily routine balances teacher-directed instruction with child-initiated exploration, providing structure without rigidity. Children know how to move between activities, where to find what they need, and what’s expected of them in different areas.
Materials and Resources You’ll Need
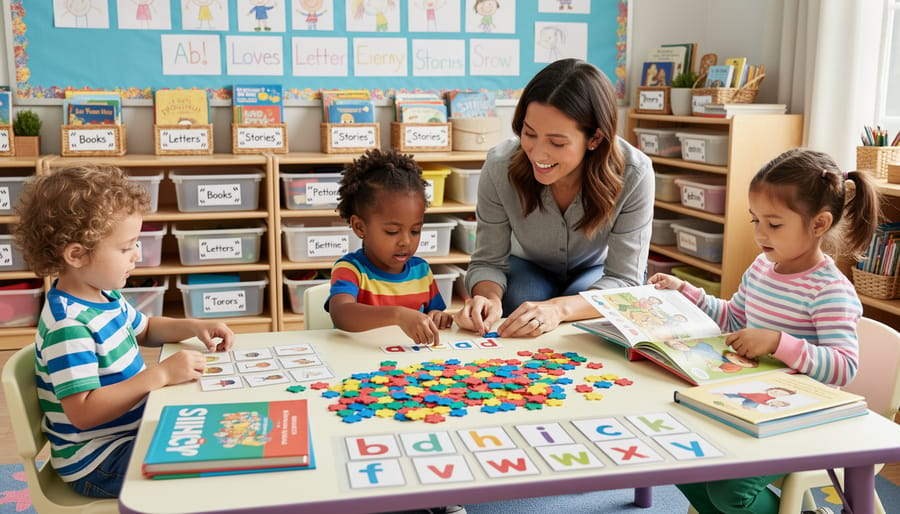
Building a high-quality early childhood environment requires careful selection of materials that promote exploration, independence, and skill development across multiple domains. The materials you choose directly shape how children engage with learning centers, so prioritize open-ended items that grow with learners and reflect the diverse backgrounds of your students.
Literacy Center
Stock your literacy area with board books, picture books, and leveled readers that represent culturally rich stories and diverse family structures. Include alphabet manipulatives, magnetic letters, white boards with dry-erase markers, listening stations with headphones, and writing materials like pencils, crayons, and paper in various sizes. Budget alternative: create book baskets from repurposed containers and request book donations from families or local libraries.
Math Center
Gather counting manipulatives such as buttons, shells, or stones; pattern blocks; measuring tools like rulers, scales, and measuring cups; number cards; sorting trays; and linking cubes. Simple items like egg cartons, bottle caps, and dice work as effective low-cost substitutes.
Science and Discovery Center
Equip this space with magnifying glasses, prisms, balance scales, living plants, natural objects (pinecones, rocks, leaves), simple machines, and observation journals. Add tools for investigation: tweezers, droppers, containers for sorting, and field guides with real photographs.
Dramatic Play Center
Include child-sized furniture, kitchen items, dress-up clothes representing various professions and cultures, dolls reflecting diverse skin tones and abilities, play food, telephones, purses, and baby care items. Rotate themes regularly with cardboard boxes, fabric scraps, and household items donated by families.
Supply washable paints, brushes in various sizes, crayons, markers, child-safe scissors, glue sticks, tape, collage materials, playdough, clay, and paper in multiple colors and textures. Keep recyclable materials like cardboard tubes, fabric scraps, and egg cartons on hand.
Block Center
Provide unit blocks in various shapes, hollow blocks for large construction, vehicles, small figures representing diverse people and families, and baskets for organization. Consider foam blocks as a quieter, lighter alternative.
Sensory Center
This area requires bins or tables, sensory materials like water, sand, rice, or beans, scoops, funnels, containers, and tools that offer sensory support through varied textures and resistance levels.
- Low shelves (24-36 inches high) with visible, labeled bins
- Child-sized tables and chairs that allow feet to rest flat on the floor
- Soft seating like cushions, bean bags, or a small couch for the literacy area
- Area rugs to define spaces and reduce noise
- Storage systems: clear containers, baskets, and trays for organizing materials
- Display boards at children’s eye level for showcasing work
- Natural lighting or full-spectrum bulbs where possible
Start with essentials in each center, then add materials based on observed interests. Quality matters more than quantity, five well-chosen items spark richer play than twenty random objects.
Safety and Accessibility Considerations
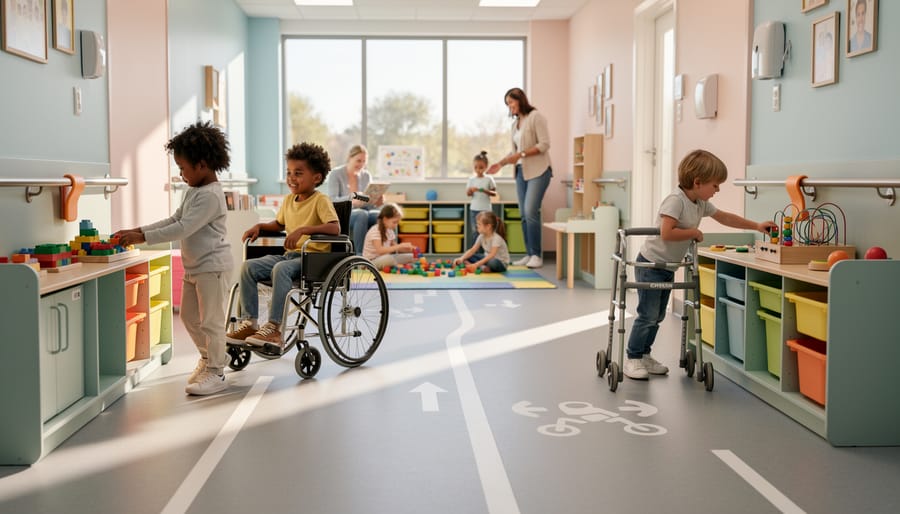
Before you arrange furniture or stock shelves, you must address critical safety and accessibility standards. Overlooking these requirements puts children at risk and may violate legal obligations.
Start with choking hazard prevention. Any item smaller than a toilet paper tube (approximately 1.25 inches in diameter) poses a choking risk for children under three. Regularly inspect all materials for broken pieces, loose buttons, and small detachable parts. Remove damaged items immediately, and store materials with small components in centers restricted to older children who can safely use them.
Address allergen awareness by maintaining a detailed list of children’s known allergies and sensitivities. If any child has severe allergies, remove common triggers like latex, certain art supplies, or food-based sensory materials. Post allergy alerts where all staff can see them, and keep epinephrine auto-injectors accessible to trained adults.
For accessibility compliance, ensure pathways between centers are at least 36 inches wide to accommodate wheelchairs and walkers. Position materials on low, open shelves so children of all abilities can reach them independently. Provide adaptive seating options, including chairs with arms for children who need postural support, and ensure visual materials include tactile elements for children with vision impairments.
Create quiet, low-stimulation spaces where children who struggle with emotional regulation can retreat when overwhelmed. These spaces should be visible to staff but separated from high-traffic areas.
Review your state’s child care licensing requirements for specific ratios, square footage per child, and additional safety mandates. Inclusive design isn’t just about compliance, it ensures every child can participate fully in your carefully planned environment.
Step-by-Step Process for Setting Up Your Environment
Step 1: Assess Your Space and Define Zones
Begin by measuring your classroom and creating a simple floor plan on graph paper or using a free tool like Floorplanner. Note the dimensions of each wall, the location of windows, doors, and fixed features like sinks or built-in shelves. Walk through your space at different times of day to observe where natural light falls, these bright spots work best for activities requiring fine motor skills, like writing or art.
Next, identify natural traffic patterns by imagining how children move between the door, bathroom, cubbies, and large-group area. Mark these pathways on your floor plan. High-traffic routes should remain clear, while quieter centers belong in protected corners away from main walkways.
Now estimate how many learning centers your space can accommodate. A standard early childhood classroom (approximately 900-1,200 square feet) typically supports 6-8 centers. Smaller spaces might accommodate 4-5 well-defined areas. Each center needs roughly 40-60 square feet to allow 3-4 children to play comfortably without crowding.
Consider adjacencies: noisy centers (blocks, dramatic play) should cluster together, separate from quiet zones (library, writing). Place messy centers like art and sensory near the sink. This strategic mapping prevents disruptions and helps children focus within each zone.
Step 2: Plan Learning Center Layout
Once you’ve mapped your space, the next decision is where each center goes. Strategic placement prevents chaos and maximizes learning potential.
Start by grouping centers based on noise levels. Position noisy, active centers like blocks and dramatic play near each other, away from quiet areas. Literacy and math centers work best in calmer zones with minimal distractions. This zoning reduces disruption and helps children self-regulate their activity levels.
Consider supervision needs. Place centers requiring frequent adult support, like science experiments or cooking activities, within clear sightlines from your primary teaching position. Centers that encourage independent work, such as puzzles or writing, can occupy corners where children feel secure but don’t need constant oversight.
Think about complementary activities. Locate the art center near a sink. Position the library adjacent to the writing center so children can reference books during their work. Keep the sensory table away from carpeted areas to contain mess.
Create defined pathways at least three feet wide between centers. Children should move through the room without stepping through someone else’s workspace. Use furniture backs, low shelves, or tape on the floor to mark clear boundaries that signal where one center ends and another begins.
Step 3: Select and Arrange Furniture
Prioritize low, child-height furniture that children can move and rearrange themselves. Tables should allow feet to rest flat on the floor while seated, typically 18-20 inches high for preschoolers. Open shelving at child level, 24 to 36 inches, lets children see and retrieve materials without adult help, building autonomy.
Position teacher seating strategically so you can supervise multiple centers at once. Avoid tall bookcases or storage units that block sightlines. Place heavier, stationary pieces like dramatic play kitchens or sensory tables first, then add movable elements, lightweight chairs, floor cushions, small rugs, that children can adjust to their needs.
Create clear pathways between centers, at least 36 inches wide, so children move freely without disrupting peers. Arrange furniture to define center boundaries naturally: a low shelf can separate blocks from quiet reading without walls. Use round or kidney-shaped tables for small-group work, which encourage conversation better than rectangular ones and eliminate “head of table” hierarchy.
Step 4: Stock Centers with Intentional Materials
Once your centers have furniture in place, focus on selecting materials that invite genuine learning, not just activity. Developmentally appropriate materials match children’s current abilities while offering just enough challenge to spark growth, think puzzles with varying piece counts, blocks in multiple sizes, or sensory bins with tools that require different grip strengths.
Prioritize open-ended materials that children can use in multiple ways. A set of wooden blocks serves math, engineering, dramatic play, and collaborative problem-solving. Loose parts like shells, fabric scraps, and natural items support creativity across centers without prescribing a single outcome.
Representation matters. Stock dramatic play with dolls of different skin tones, kitchen items from various cultures, and family structure diversity. Include books featuring characters with disabilities, multilingual labels, and art materials in skin-tone ranges beyond peach. Children build identity and empathy when they see themselves and others authentically reflected.
Align materials with specific learning goals. If you’re focusing on fine motor development, add tweezers to the sensory table, lacing cards to quiet spaces, and paintbrushes of varying widths to art centers. Every item should serve a purpose beyond filling the shelf.
Step 5: Create Visual Supports and Labels
Visual supports transform your learning centers from spaces children use into environments where they can read, navigate, and manage independently. Start with picture labels on every storage container, shelf, and center entrance. These labels should pair a clear photograph or simple line drawing with the printed word beneath it, showing exactly what belongs inside a bin or on a shelf. Children learn to match objects to images, then gradually connect the printed word to both the object and picture, building early literacy skills through daily cleanup routines.
Create visual schedules that show the day’s flow using pictures and words. Mount these at child eye-level near the door or gathering area, so children can reference what comes next without asking an adult. For learning centers, add small visual choice boards showing the activities available in that space, this supports decision-making and reduces the “I don’t know what to do” moments that lead to wandering or conflict.
If you serve children from diverse language backgrounds, include labels in multiple languages to honor home languages and support dual language learning. Use consistent color-coding across centers, perhaps green borders for all science materials, blue for literacy, so children recognize organizational systems visually before they can read every word. This layered approach builds independence and prepares children to navigate print-rich environments beyond your classroom.
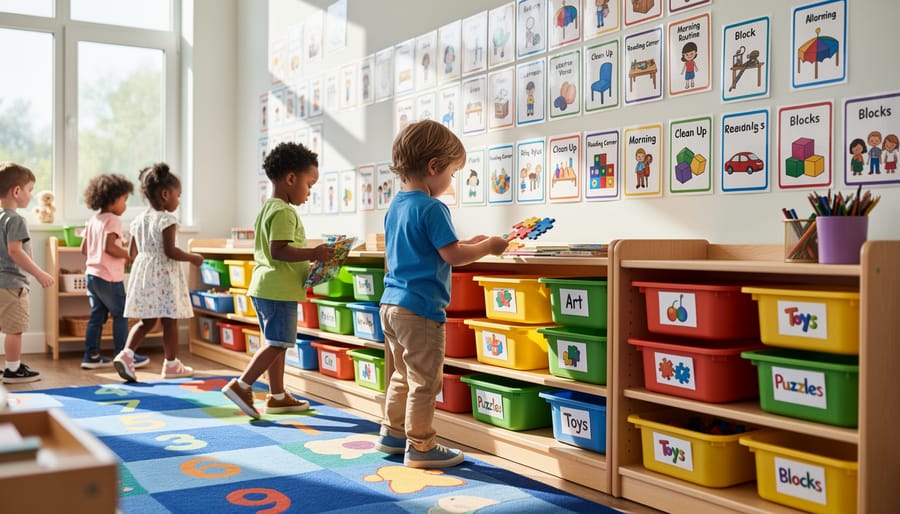
Step 6: Establish Routines and Introduce the Space
Once your physical environment is ready, the crucial work of teaching children how to use it begins. High-quality environments don’t function automatically, children need explicit instruction and consistent practice to develop independence.
Start by introducing one or two centers at a time rather than overwhelming children with the entire classroom at once. Gather children near a center and demonstrate exactly how to use its materials, where items belong, and what “finished work” looks like. Model specific behaviors: “Watch how I take the puzzle from the shelf with two hands. When I’m done, I put each piece back before choosing another activity.”
Practice these routines through guided exploration. Invite children to demonstrate proper material handling while you observe and provide supportive feedback. Establish clear cleanup signals, a song, chime, or verbal cue, and rehearse the cleanup sequence multiple times during the first weeks.
Create simple visual reminders showing how many children each center accommodates and basic rules illustrated with photographs of actual students using materials correctly. These supports make expectations visible and accessible.
Expect to reteach and refine routines throughout the year as children develop new skills and interests emerge.
How to Verify Your Environment Supports Quality Learning
Once you’ve set up your early childhood environment, observation becomes your primary verification tool. The space should work for children, not just look good to adults. Watch how children move, interact, and engage throughout the day, their behavior reveals whether the environment truly supports learning.
Start with engagement cues. Children in a well-designed environment stay focused during center time without constant redirection. You’ll notice them making choices independently, transitioning smoothly between activities, and using materials in both expected and creative ways. When you see a child return to the same center repeatedly over several days, that’s evidence the materials match their developmental interests. Conversely, centers that remain empty or spark only fleeting attention need adjustment.
Look for these positive indicators during your observations:
- Children select and return materials without adult assistance
- Conversations happen naturally between peers during play
- Multiple children use the same center simultaneously without conflict
- Materials show evidence of use, blocks built and rebuilt, art supplies depleted, dramatic play props rearranged
- Children can locate what they need using visual labels and organizational systems
- Noise levels allow for both active and quiet learning without interference
- You spend more time observing and facilitating than managing behavior or searching for supplies
Schedule brief observation windows three times per week to note which centers attract children and which don’t. Document specific behaviors: Are children problem-solving together? Do they talk about their work? Can they explain what they’re doing and why?
Watch for adjustment triggers that signal needed changes. If children consistently use materials incorrectly despite instruction, the items may be developmentally inappropriate. Frequent conflicts in one area suggest the space feels too crowded or lacks clear boundaries. When you find yourself repeatedly redirecting children away from unsafe behaviors, the environment itself needs modification, rules alone won’t fix a poorly designed space.
Next Steps: Maintaining and Evolving Your Environment
A high-quality early childhood environment isn’t something you build once and leave unchanged. Children grow, interests shift, and what engaged them in September may bore them by January. Treat your classroom as a living system that evolves with your students.
Observe and Document Continuously
Watch how children actually use each center. Are they bypassing the science area? Spending twenty minutes at the block center every day? Take photos weekly and jot quick notes about engagement patterns. These observations reveal what’s working and what needs refreshing.
Rotate Materials Seasonally
Every six to eight weeks, swap out materials to maintain novelty and align with emerging skills. Store tired materials away, they often regain appeal after a break. Introduce new items gradually rather than overhauling everything at once, which can overwhelm children who rely on predictability.
Follow Children’s Lead
When three students spend every choice time building “animal hospitals,” that’s your cue. Add veterinary props to dramatic play, animal care books to literacy, and X-ray images to the science area. Responsive environments validate children’s thinking and extend their exploration.
Schedule Monthly Environment Checks
Set a recurring calendar reminder to assess safety (loose screws, worn materials), organization (are labels still visible?), and accessibility (can all children reach what they need?). Small fixes prevent bigger problems.
Quality environments require ongoing attention, but the investment pays off in sustained engagement and deeper learning throughout the year.
Common Questions About Early Childhood Environments
Creating high-quality early childhood environments raises practical questions for every educator. These answers address the most common concerns teachers face when transforming their spaces.
What if my classroom is too small for multiple learning centers?
Focus on flexible, multi-purpose centers that can transform throughout the day. A reading corner can become a quiet reflection space during rest time, and dramatic play materials can rotate weekly to prevent overcrowding while maintaining variety.
How do I create a quality environment with a limited budget?
Prioritize open-ended, natural materials like cardboard boxes, fabric scraps, and donated household items that children can use in multiple ways. Community partnerships with local businesses, parent donations, and grant applications can supplement purchased materials over time.
How should I adapt my environment for mixed-age groups?
Design centers with materials at multiple developmental levels, placing simpler items on lower shelves for younger children and more complex materials higher up. Label everything with both pictures and words to support emerging readers while helping pre-readers navigate independently.
How can I help parents understand why the environment matters?
Share photos showing children engaged in purposeful play within learning centers, and explain how specific materials connect to developmental milestones. Invite families to visit during center time so they can observe firsthand how the environment supports learning.
Beyond these common concerns, many educators wonder how to maintain quality when facing high staff turnover or inconsistent administrative support. Document your environment design decisions with photos and brief explanations of the learning goals behind each center. This creates institutional knowledge that persists even when personnel changes occur.
When resources feel stretched, remember that quality comes from intentionality, not expense. A well-organized basket of natural objects collected during nature walks offers more learning potential than expensive plastic toys used randomly. Children need thoughtfully selected materials presented in accessible ways, not abundance.
For educators working in shared spaces or traveling between classrooms, portable systems become essential. Invest in clearly labeled bins that can transform any space into learning centers within minutes. Laminated visual supports and collapsible storage create consistency for children even when the physical location changes.
The forum community offers a space to exchange specific solutions with educators facing similar constraints. Teachers regularly share room layouts, budget-friendly material lists, and creative adaptations that work in real classrooms. These peer-tested strategies often prove more valuable than theoretical advice because they come from practitioners who understand your daily reality.
Creating a high-quality early childhood environment isn’t about perfection on day one. It’s about intentional choices that compound over time. Every learning center you thoughtfully arrange, every material you select with purpose, every routine you establish, these decisions directly shape how children explore, connect, and grow.
Start with one area that feels manageable. Maybe it’s reorganizing your literacy center with clearer labels, or creating better pathways between zones. Small, deliberate changes build momentum and confidence.
You don’t have to figure this out alone. Connect with other educators who understand the realities of limited budgets, small spaces, and diverse learner needs. Share what’s working in your classroom and learn from colleagues who’ve solved similar challenges. The collective wisdom of educators creates solutions no single person could develop in isolation.
View your environment as a living aspect of your teaching practice. It will shift as children’s interests evolve, as you observe what’s working, and as you gain new insights. That’s not a flaw, it’s evidence of responsive, professional practice.
The environment you create today sets the foundation for the learning that happens tomorrow. Your effort matters, and the children in your care will show you exactly how much.